EDAMAME SOY BEANS
 I grew up in Ohio and although I did not grow up on a farm, I was surrounded by them. Mostly beef cattle, hay fields, corn and soybeans. Of course most of the corn and soybeans were grown for finishing cows in feedlots. (We all know that grass-fed is better, right?) Anyway, these soybeans, unless roasted, were pretty bland, starchy. So when I first heard about growing soybeans when I was working in PA, these starchy beans are what I thought of. Boy was I wrong! Edamame are a variety of soy beans that are grown and used a snack food in much of Asia. They are easy to prepare and even more fun to eat. They grow on a bush like a green bean. Since these plants only flower once, all the beans are ready at one time. So I harvest the entire plant and make you pick off the beans. Call it my fall break. I harvest as many plants as you guys will eat. The remaining plants turn yellow in the field and I let them dry there. After they are dry, I harvest the entire plant and thresh it..knocking off all the outer shell and keeping just the bean. These dry beans I use for seeding the following year. They are also good as a dry bean, so if you don't get to your edamame while they are fresh, don't be afraid to remove them from the pod, soak them a bit like dry beans and then cook them up.
How do you prepare fresh Edamame? Remove the pods from the plants and place them in a pot of salty boiling water. Boil them until tender and drain. Then you slip the pod through your teeth; pulling the beans out into your mouth--DO NOT EAT THE POD! (stringy!) I sometimes like to drizzle olive oil, garlic or soy sauce on the shells so as you pull them through your teeth, you get the flavors. Have fun with them!
Ahhh, cooler weather! The 2.5 inches of rain Friday night was welcome and this breeze has been heavenly. It feels like it is cleansing the earth after all of that hot and dry. One downside to the breeze is the bit of anxiety it brings me. Wind has always made me a bit nervous but now with the new hoop house, it hits my nerves even harder. Please please please don't blow away or get damaged in a storm!
 On a good note, the hoop house is just about finished. I have a few more things to do, but for the most part, it is DONE--barring any unforseen happenstances, like Milo running across the top, ripping the plastic (he did really). I was planning on seeding the first succession of greens the 3rd week of September. But it has been so hot..nearly 120 degrees in there! So hot, it killed all the weeds! That was my plan all along :)
Today truly felt like fall. I started to harvest the cornstalks towering over the pumpkins...so orange and round. Simon, Sunny and Milo all helped. Oh and Zach too, well he took photos of me working. We feed the stalks to the cows and pigs, they love their sugary sweet taste. And it gives them something to play with for awhile.

So this week I will start to limit your share again. The beans, melons, cucs, zucs and summer squash are just about finished. We may have a couple of weeks of lull since most of the fall crops are still in shock from all the late heat. But soon we will fall into fall and be back on schedule. No worries, I won't let you starve!
This Week's Loot: edamame soybeans, zucs, carrots, onions, beets, chard, tomatoes, hot peppers and GARLIC!
Next Week's Loot: lettuce! carrots, kale, tomatoes...
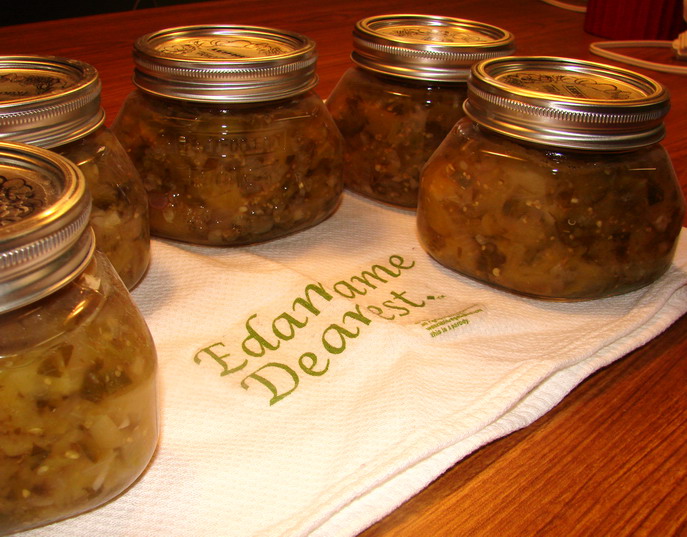
Green Tomatillo Salsa--in PYO garden
Cooking it is simplicity itself; you just chop the ingredients–I did the tomatillos in medium sized dice, and the peppers and onions in small dice, and minced the garlic and cilantro–and then put everything in a pot, bring it to a boil, turn it down and simmer it for ten minutes. I find that the colors look especially lovely in the uncooked salsa–not only does the red onion boost the sweetness of the salsa and complement the natural sugars in the fruit, but the violet color, even in the finished, canned product, looks lovely flecked through the variegated greens of the salsa.
The recipe I give here fills five pint jars or ten half pints. Whether you pack into the larger or smaller jars, the processing time is the same–you boil them in the covered canner for fifteen minutes. Then, remove from heat and let sit for five minutes before opening the canner and lifting the jars from the water.
So, what do I intend to do with my finished salsas verde?
Make enchiladas verde, of course! Or chile with pork and white beans….mmm.
There are lots of possibilities for soul warming foods to be made with this salsa in the coming winter months.
Tomatillo Salsa For Hot Water Bath Canning
Ingredients:
11 cups husked, cored and chopped tomatillos2 cups diced red onion1 cup green Anaheim or New Mexico chiles, diced finely1/2 cup green jalapeno chiles, diced finely1/2 cup green poblano chiles, diced finely8 cloves garlic, minced1 cup white distilled vinegar8 tablespoons lime juice2 teaspoons ground cumin4 tablespoons finely minced cilantro1/2 teaspoon smoked paprika1 teaspoon salt
Method:
Wash five pint or ten half pint jars, their lids and rings thoroughly in hot, soapy water and rinse well.
Fit jars in the rack to a three-quarters full hot water bath canner, lower into the water, and bring to a boil. Lower heat and simmer for ten minutes. (Make sure water comes over the top of the jars and fills them all the way up. Turn off heat and allow jars to sit
Put lids in a saucepan and bring to a simmer–not a boil–and allow to simmer for ten minutes. Turn off heat and keep the lids warm.
Put all the ingredients to the salsa in a clean, heavy bottomed dutch oven or stockpot. Bring to a boil, stirring constantly, then turn heat down and cook at a vigorous simmer for ten minutes, stirring now and again. Turn heat off of salsa.
 Taking a walk around the fields today...I can't believe it is October. The season has flown by and although I am happy with most crops, I was hoping for a little Indian Summer to beef up a few last minute plantings. Yellow and red leaves shower me as I drive under the maple trees on the edge of the field and watching the cows graze in front of a backdrop of color has been delightful these past few days. My back is sore from lugging most of the winter squash into our basement to protect them from cold nights, and long rows of carrots, beets, rutabagas and cabbage await their chance to be bundled in my arms. It is very satisfying to feel abundant, rich in food. A joy to rid of that "pit of the stomach ache" that drenched me in the early summer. I hope that you, too, have felt abundant in food most of this season and for seasons to come.
 Goodbye to the 8 not-so-little pigs. I admit, I am a little sad and am not ready for them to go--they are so entertaining! But alas, I am a meat eater and what better meat to eat?!
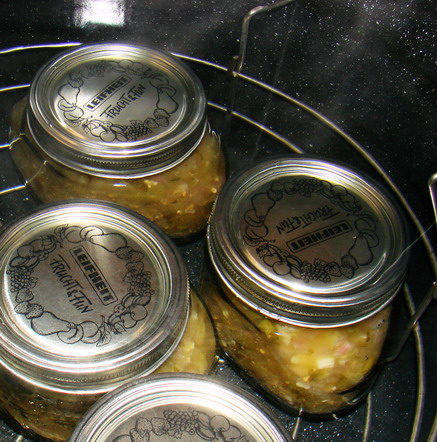